Hoshino Must Die
|
Releasing the Light - Harvesting the Bulb of Mornings - Harvesting the Bulb of Harvests - Harvesting the Bulb of Twilight - Hoshino Must Die |
| Walkthrough & Notes Dungeons & Maps Rewards Images Dialog Update History |
| Hoshino Must Die | |
|---|---|
| Level: | ?? |
| Type: | Group |
| Starts At: | ?? |
| Time to Complete: | 2-3 hours |
| Repeat: | ?? |
| Contracts: | Contract for Defeat Hoshino Kei |
Quest Overview
Enter the private quarters of the Hoshino Fortress and strike down the materialized Hoshino Kei.
You must have completed Harvesting the Bulb of Twilight to start this quest.
This quest is currently one of the longest and most difficult in the game. As a result, quest leaders often suggest each player bring 1 Archer's Jewel (pierce protection), and at least 1 Evader's Crystal (melee defense) and Resister's Crystal (magic defense). It is not uncommon for this quest to take 3+ hours to complete under normal circumstances although an experienced group can finish it in 2 hours.
Many players feel that some of the mechanics of this quest are poorly designed and implemented. These issues include:
- Requiring players to re-flag in 3 separate dungeons for the final dungeon for each completion of the quest.
- The lack of an accessible return portal to get back to the final dungeon if someone dies or disconnects.
- The difficulty and length of the final boss fight combined with only 9 reward items dropped per kill.
- The 4 pre-requisite flagging quests which must be done in order to attempt this quest.
These issues have been brought up several times on the official AC forums where they have been ignored by the Turbine developers. As a result, this quest is somewhat controversial in terms of its role as the culmination of the Hoshino storyline.
Walk Through
Part 1: Breaking the Wards
- Talk to Lord Brem at the Royal Tent. ***REQUIRED***
- Route: Take the Stonehold portal in the North wing of Town Network, then take the Desolation Beach portal at 69.9N, 20.2W, from the drop point run to the Royal Tent at 80.7n, 43.0w.
- Everyone in the group will have to click 3 mnemosynes located in 3 separate dungeons.
- In each of the 3 towns surrounding Hoshino Fort, look for a mysterious hatch. Click it to access each of the dungeons.
- Town 1: 78.6N 40.6W - the hatch is in the Sho-style armorer building and can be accessed from outside through the wall (no need to enter the building).
- Town 2: 78.2N, 42.3W - from town 1, run W then S for a safe route. The hatch is in the mage tower,under the stairs on the first floor. You must enter the building to access it.
- Town 3: 79.7N, 41.0W - the hatch is on the first floor of the tavern and you must enter the building to access it.
- Note: The coordinates given are for safe areas on the edge of each town with the correct building just ahead.
- Make your way to the end of each dungeon. There will be lever doors throughout. Sometimes the lever or button will be located next to the door, and sometimes you will have to backtrack to find it.
- At the end, you must kill a Daimyo boss (25k HP), which will open a portal to the mnemosyne you need to click. You must kill the boss in the large room he is in or there will not be enough room for the portal to open.
- [OPTIONAL] - Once you have clicked on all 3 mnemosynes, return to Lord Brem and talk to him.
Part 2: Gauntlet
- You must now collect the pieces to get the key to Hoshino Fortress. See the Hoshino Fortress Infiltration page for more details.
- Enter Hoshino Fort and in the first courtyard, look for a mysterious hatch inside the gazebo to the right of the main gate. Click it to access the final dungeon.
- At the entrance you will see a Private Quarters portal, which will take you back to the final room once you have entered this portal at the end of the first section of the dungeon. However, keep in mind you will need a new key to enter Hoshino Fort every time in order to get back and access this portal. Thus, it is most useful only if the entire group dies.
- The first section of the dungeon will be a gauntlet of several large rooms with a fast respawn rate. You must kill your way through, keeping in mind that if you take too long, respawn from the previous large room can catch you from the back.
- Warning: After you clear the first room there is an especially fast respawn that is guaranteed to catch you before you finish the second room. This maybe by design or perhaps there is a floor trap in the exiting hallway that triggers it. Whatever the case be very careful after clearing the first room.
- You will then come to a large metal door located at a 3-way. You will have to enter each fork to the left and right, pushing switches to open it.
- Facing the large metal door, the options are left or right.
- On both the left and the right, there is an immediate T-intersection, again with left and right paths, for a total of 4 paths. We can designate them by the turn order as RR, RL, LL, LR.
- At the end of each path is either a floor lever (first path only) or a room (really just a door blocking the end of the hallway) containing a floor lever, such that the door is opened by some other lever. The doors can also be opened by a floor plate inside the room.
- The basic idea is that the first lever is used to open one of the rooms, inside of which contains another lever which opens the next room, etc. The last lever opens the original metal door.
- The order in which the paths that must be traversed (and levers pulled) is RR, LR, RL, LL.
- It is possible for a single person to activate all four levers unaided as each door will stay open for enough time (but not much more) for a single person to hit a lever and then run through the next door before it closes. Be warned that there are a few mobs in the hallways, but, in fact, the rooms containing the levers are empty (though mobs will follow a player into the room).
- The next section is a loop with a floor lever halfway around the loop. Opposite the lever is a hallway with a metal door at the end. The floor lever opens the metal door, just inside of which is a jump down.
- The jump is safe as long as you don't move forward. Ahead, you will notice 2 metal gates and tunnels to the east and west.
- You have some options here. You can send two people to simultaneously pull levers located in the large rooms down these tunnels (healers can remain just inside each tunnel and still reach the pusher). Alternatively, one person or a small group can do the pulling while others are left behind to block the two gates, which close quickly. If blocking, pull the lever in the WEST tunnel first (as this opens the first gate). Note the respawn at the gates is fast so it is advised the bulk of the group remain to defend there.
Part 3: Trap Corridor
- Once past the gates do not rush ahead - there is a pyramid trap. You will also find a lever on the wall right before the entrance to the tunnel with the trap.
- Note: Pyramid traps do roughly 400 damage with an aegis active. A pierce protection rare negates all damage.
- In the trap tunnel, there is a wooden door (no lever, it's just a normal door). Midway through the tunnel there is a 4-way (with colored mist) where you will notice a frost ring spell trap that fires every couple of seconds. Once the trap fires, pyramids will shoot out of the same location going in all 4 directions. Note that the pyramids may in rare cases fire simultaneously but more often will fire one at a time following a pattern. First, a pyramid will head toward you (backwards). Then a pyramid will head toward the wooden door (forward). Likewise, pyramids will also shoot off into the other 2 tunnels (to the left, S and right, N). There will be cubicles in the tunnel wall that you can use to make your way forward.
- Solving this part requires coordinated lever work. Past the wooden door, you will find a lever-activated metal gate (your goal). To open this gate, you must first press the lever at the entrance to the trap tunnel.
- This will then open a gate to a room with a lever in the tunnel to the right (N) from the 4-way. One person should make their way there to pull this lever when the door opens.
- Doing so opens a door to a lever room in the S tunnel from the 4-way and likewise you should position a person there. The person pushing the lever in the N tunnel will not be able to make it to the S tunnel on time without hitting a pyramid - remember pyramids will also fly down these tunnels.
- Once you pull this lever, the metal gate past the wooden door will open. There is a lever right after it, which you can use to re-open it. Thus, there is no need to block it as long as one person makes it past.
Part 4: Jumping Puzzle
- You will next reach the jumping puzzle room, which you will enter from the S end. This room has an acid pit, and many creatures (most of whom will jump down in the acid). Only 1 person out of the whole group must complete the jumps. The goal to jump your way up, and into a tunnel (very high up) on the N side of the room. There is also a lever there, which will spawn a portal down below used to bypass the acid pit jumps for the rest of your group.
- If you fall, you can get back up by shift jumping onto a small platform out of the acid pit. From there, you must do a full jump to a set of platforms arranged in a row. Keep in mind you should stand as far back on the small platform as you can before full jumping to make it. Once on the row of platforms, shift jump back out to the entrance stage.
- Lockpick Bonus: In the acid pit, you will find a tunnel leading to a Chorizite Chest, which appears to follow a modified tier 8 rule. The difficulty is 600, and the chest resists spells so you cannot cast weaken lock on it. Only one person must have lockpick to open the chest for everyone else.
- The first jump is to a set of platforms just to the left of the entrance to the room. This is a full shift jump (take a step back from the edge to do it).
- Next, jump in a diagonal (about SW) to a set of platforms located along the S wall. This is a 3/8 power normal jump (for 563 jump skill, which I will assume for all other jumps). You can use the wall to stop you depending on how you aim.
- Next, full jump to the SW corner of the room.
- The next jump is to a square platform in the center of the room. This is a difficult jump that requires about, but no more than, 1/2 power.
- From here you will make a jump to the W onto a set of platforms arranged in a right angle. This is a full power jump but you will barely make it. Keep in mind a higher jump skill can overshoot if using full power.
- The last jump is to the opening on the N wall (marked by two torches), and also full power.
- Once there, you can pull the lever to open the shortcut portal for the rest of your group below.
Part 5: Private Quarters
- Ahead, you will fight a few more spawns and at last reach the Private Quarters portal. The drop is safe.
- You will now be in a large room with the Spirit of Bist'elle and a mnemosyne. DO NOT click on the mnemosyne unless ready to begin combat. Everyone in the group can talk to her (unknown if this is required).
- This fight requires teamwork. By clicking the mnemosyne, the room will be filled with creatures on a fast respawn. An NPC form of Hoshino Kei will also spawn next to the mnemosyne. DO NOT at any time speak to her - she will portal you to Fort Tethana. The goal is to kill three large ward crystals (Blight, Decay, and Darkness) that will also spawn in separate locations in this room. Archers can machine gun the crystals but they are immune to life magic. Once each crystal dies, it will be replaced by an NPC that you must protect. If the NPC dies, the crystal will respawn and you will have to kill it again. Note that you cannot heal the NPC and must instead kill the spawns that attack it.
- Note: The NPCs are Spirit of Khira'thi, Spirit of Rhia'ni, and Spirit of Dana'lith.
- The suggested strategy is to remain near the corners of the room, using the archways as cover to protect yourself from the void mages and archers.
- You should move around the perimeter of the room as a group and have your archers bring each crystal down to very low HP while everyone else kills the melee spawns. When one crystal is low, move along the wall as a group to take cover near the next one and repeat.
- Ignore the skeleton archers and only kill void mages that have come to melee you. The respawn is very fast and attempting to keep up with a small group is futile.
- When all crystals are low, kill them all simultaneously. This will save you from having to defend each NPC while some of the crystals are still alive.
- The crystals do regenerate so make sure all of them are still low prior to giving the signal to finish them.
- Kill the archers and mages just prior to finishing the crystals and move your group near the middle of the room to act as decoys for the spawns.
- The crystals do regenerate so make sure all of them are still low prior to giving the signal to finish them.
- To defend the NPCs, move your group to the middle of the room and prioritize archers and mages along with any melee mobs attacking them.
- Note: If you have summoners in the group, they should play it smart and not summon next to the NPCs you're supposed to be defending, as minions will attack the NPCs.
- Once all crystals are dead, and all NPCs remain alive for 5min, Hoshino Kei will become vulnerable and the NPCs you were defending will despawn, but the monster respawns will continue. To
- You can imperil and vul the Materialized Hoshino Kei, but she will dispell constantly (it is a level 8 dispell). You may choose to assign a dedicated vuler. Keep in mind she has very high magic defense and 500250 HP. She can also dispel your buffs (including rares!). Hoshino sticks to the center of the room mostly, however, if she targets a player on the edge of the room with a ring spell she will move to them.
- Once dead, pick up a Mirror Shard from her body. She drops 9. These shards are turned in to the Spirit of Bist'elle who will give you a key to a reward chest, as well as the XP and luminance rewards, then portal you to the chest room.
- Loot the Legendary Empowered Robe of Utter Darkness from the altar in the NE corner, then use the key to loot the chest of your choice.
- Note: You do not need to return to Lord Brem, as he will give no additional rewards and will only tell you how much is left on your timer. He will NOT accept the robe for additional luminance.
Maps
| Dungeon | Coordinates | Wiki Map | ACmaps |
|---|---|---|---|
| ?? | ?? | -- | -- |
Items and Objects
![]() Legendary Empowered Robe of Utter Darkness
Legendary Empowered Robe of Utter Darkness![]() Legendary Key
Legendary Key
![]() Empowered Robe of Utter Darkness
Empowered Robe of Utter Darkness
Experience Rewards
Images
Click image for full size version.
-
-
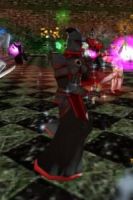
Hoshino Final Battle
-
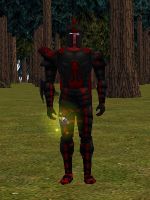
Materialized Hoshino Kei


Lore & Dialog
Hoshino's Taunts:
An amused voice in your mind says, "You begin to see how feeble your magics are when compared to the powers of the Book."
An amused voice in your mind says, "Is that it? Is that all you have, (player)?"
An amused voice in your mind says, "Well struck,(player). Perhaps there's hope for you yet."
An amused voice in your mind says, "When you are dead and raised into my service, (player), I'll teach you real magic."
An amused voice in your mind says, "You may yet make a fine servant, (player), with some additional training."
Death of Hoshino:
A wave of cold radiating from northern Osteth rips through the air like a shockwave as (the killer) strikes down the spectral form of Hoshino Kei!
A ragged voice in your mind says, "You may have defeated me, for now, but this little trap of yours will not hold me forever."
Reward:
You allow Spirit of Bist'elle to examine your Mirror Shard.
You hand over 1 of your Mirror Shards.
The Spirit of Bist'elle studies the shard for a moment, and then it disappears in a small flash of light.
Spirit of Bist'elle tells you, "You have done very well. A great evil was sealed away, and we all have you and your companions to thank for it."
Spirit of Bist'elle tells you, "You've earned this. I found it in the adjacent room. I'll send you there now, if you wish."
Spirit of Bist'elle gives you Legendary Key.
You've earned 500,000,000 experience.
You've earned ??,??? Luminance.
Talking to Hoshino Kei:
The Spectre of Hoshino Kei smiles and you hear in your head, "This little ritual may hold me here for the moment, but I doubt the same applies to you. Let's find out."
Notes
- Special thanks to Absolution of Frostfell for figuring out the jumps, and credit to the rest of the group (Aristogeiton, Chevalier de Avaritia, and Tectonic Rifts).
- The quest was updated during Balance of Power to add a 5 use Legendary Key in place of the old Inner Sanctum Key and also the Empowered Robe of Utter Darkness was upgraded to the Legendary Empowered Robe of Utter Darkness (Epic Willpower was converted to Legendary Willpower). The Empowered Robe of Utter Darkness is now retired.
- During the Curating Corruption event the Luminance reward was increased from 50,000 to 100,000