Society Infiltration
Related topics: Augmentation Gems
| Walkthrough & Notes Dungeons & Maps Rewards Images Dialog Update History |
| Society Infiltration | |
|---|---|
| Level: | ?? |
| Type: | Solo |
| Starts At: | ?? |
| Time to Complete: | 40 minutes |
| Repeat: | ?? |
| Contracts: | Contract for Aug Gem: Society |
Quest Overview
Feuding Societies are now going after each other by infiltrating each others basements. Your mission, if you choose to accept it, is to sneak in, do as much damage as you can and get out. You have 40 minutes to complete the tasks. A strong mage can complete this quest in as little as 10 minutes. Only one person may attempt this quest at a time from each society!!!
- Note : If you die, you must wait until the 40 minutes is up in order to try again.
Walk Through
- Flagging. Talk to the Operations Aid in your Society's Stronghold ( In the west wing of the Faction Stronghold near the society armor NPCs.). If the quest is available, the Aid will teleport you to a room with an Operations Specialist and an exit portal. Talk to the Specialist, and click "Yes" only once you are ready to begin.
- Clear Two Rooms. Run, don't fight, out of the south hallway into the main room and turn left into the west hallway taking either split past the first room and stop. Kill any spawn that followed. Then clear the side room on that split and go back to the other split in the west hall and clear it. Both small side rooms must be killed. (There is no need to kill spawns in main room you passed as you went from the south hall to the west hall.) As you approach each side room, you can lure two of the soldiers into the hallway staying out of the line of fire from archers and mages. Once both side rooms are clear, this will open a door further in towards the west. **You need to pass the entry-way to each room in order for the door to open.
- Supply Room. Kill the Soldier in the next room and loot the Supply Room Key on his corpse. Unlock the Supply Room door and use the Lantern which will set the supply crates ablaze. Occasionally the Lantern will set the crates ablaze but will not unlock the east hall door. If this happens, wait for the Lantern to respawn and try again.
- Main Keys. Head east back to the main room and run across to the east hall and the next set of doors that have opened. Kill the two Master Sodiers in the hallway on both sides of the split for the two Main Keys No need to kill the remaining spawns in the side rooms - saving time. One key will unlock a door to a weapons room and the other to the locked north door in the main room.
- Loot Weapons. Unlock weapons room and loot all three weapons on the ground. Sometimes the weapons do not spawn properly. If this happens, leave the area, head back to the main room or west room, and spend a couple of minutes there. Usually the weapons will spawn after a few minutes.
- Prison Key. Head back to the main room and unlock the remaining door before the spawn in the main room has a chance to attack you. Once inside door, head back to the split hallway in order to stay out of line of fire from main room spawn. Bring one of the Master Soldiers out from the room into hallway and kill him looting the Prison Key he drops.
- Free Captives. Continue to a closed door and a "T" in the hallway. Head right and unlock the two doors with the prison key. Note that the prison doors are not directly across from one another. Talk to the Captives inside to free them.
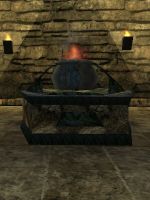
- Vat. Head back up and across to the Smelting Vat. There is a bug in this quest though. The door into the room with the smelting pot should be unlocked after the prisoners have been freed. Sometimes however the door will remain locked. When the door is locked there is a small chance you can wait for the prisoners to reappear, free them, and finish the quest. This bug appears to have something to do with timers not resetting from the previous questor. Place one weapon inside and it will take all three weapons, destroying them.
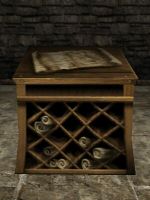
- Commander and Documents. Once the weapons are destroyed, the final door at the "T" will open where you will face a Commander. You must defeat him before you can use the Documents, otherwise you will receive a message that you do not safe with the Commander nearby. In certain cases, you can avoid killing the Commander by trapping him on the spiral staircase and simply running past to use the documents. If he is not on the top level but trapped below you will be able to use the documents without killing him. A melee character pressed for time can save several minutes with this strategy.
- Pick up the documents that can be found by pressing the '/' key after killing the Commander and you will be portaled back to the Operations Specialist. Talk to him to receive your reward.
Strategies
General Strategies
- If you have a high base Assess Creature, you can use the Utterly Flawless Lense or Incomparable Lense to Imperil enemies quickly.
- If you have a high base Alchemy, you can use the Alchemical Throwing Phials to Imperil and Vuln your targets.
Master Soldiers
- The Master Soldiers have an extremely high melee defense and a shield. Debuffing the shield does not significantly improve damage -- you must use a weapon that ignores shields.
- If you have a Weeping weapon, you will find it difficult to hit them, even with 530+ buffed skill. You must either used a Blighted weapon (which has a higher attack modifier) or debuff their weapons melee defense modifier. Since hitting them is a challenge, using a Royal Runed Weapon is not feasible until their melee defense modifier is debuffed. If you do choose to use a Weeping weapon, make sure you use an elemental one.
- Debuffing their weapons can be accomplished by using a Royal Runed Slashing Baton to land Futility, and then casting Wi's Folly. Note that the Master Mages will cast level 8 magic ineptitudes on you, except for Item Enchantment. A 360 buffed skill with Futility gives a somewhat decent chance to affect them.
- If you are an archer, using a Weeping weapon and Royal Runed Weapon on the Master Soldiers is usually fine.
- Summoned pets can help greatly with getting the soldiers turned away from you, negating their shield. A high-damage summoned pet combined with a Spectral Life rare make short work of the soldiers.
Strategies for Melees
- Use a magic absorbing shield.
- Do not stand toe-to-toe with the Mages in the first two rooms. Hit one, then leave room and heal. Come back and repeat until they are dead.
- Use a Spectral Rare from Lord M quest. The rare costs only 2 Lord Mhoire Coins and it raises your skill enough to kill quickly.
- Use Dispell Gems when taking on the mages.
- After the store room is set on fire, you do not need to worry about killing mages or archers any more. Lure the soldiers out of each room and kill them in the hallway.
- Do not try to heal inside the rooms with mages. Run to the hall and heal. The mages and archers will not follow you.
- Use Blighted/Weeping Weapon on the soldiers.
- Use Acid Rend Weapon on archers and Mages.
Master Archers
- These have an extremely high melee defense skill as well. See above strategies for countering it.
- If you are a Player Killer, you can use a Black Page of Salt and Ash to get an additional 10% attack skill modifier.
Master Mages
- These have a higher magic defense, but a lower melee defense than the rest. A good weapon with rending capability will help.
- They debuff magic skills with 8s, so a Spectral Rare or a Society Gem of Dispelling comes in handy if you are a mage.
Items
![]() Documents
Documents![]() Main Key
Main Key![]() Prison Key
Prison Key![]() Well Crafted Sword
Well Crafted Sword![]() Well Crafted Wand
Well Crafted Wand![]() Well Crafted Bow
Well Crafted Bow![]() Lantern
Lantern![]() Smelting Vat
Smelting Vat![]() Supply Room Key
Supply Room Key
Images
Click image for full size version.
-
Documents
-
Smelting Vat
-
Radiant Blood Commander
Lore & Dialog
Operations Aid tells you, "We have an important mission if you feel up to it, speak to the Operations Specialist to receive your orders."
Operations Specialist tells you, "We have an important mission if you feel up to it, we need you to infiltrate a society and find out what their plans are."
Operations Specialist tells you, "Also while inside see what you can do to sabotage the society."
Operations Specialist tells you, "We need you to do this alone to minimize the risk to our own society. Do you think you are up to it?"
When you accept he will tell you:
Operations Specialist tells you, "Very well, do not disappoint me."
If you do not reply, he will say:
Operations Specialist tells you, "Please do not waste my time any further, I must find a soldier brave enough to embark on this mission."
Release one captive:
Captive tells you, "Thank you for getting me out of here, please help our fellow brother in the other cell."
Release both captives:
Captive tells you, "Thank you for releasing us both. Good luck on your mission, we will report back to the Stronghold that you are doing well."
After using the documents:
You quickly look through the documents and make mental notes of all the important activities in these plans.
Quickly you make your escape before reinforcements can stop you from reporting back
Completion:
Operations Specialist gives you Blank Augmentation Gem.
You explain the information you found in the book.
Operations Specialist tells you, "Ahh that is most useful, you did well soldier."
Operations Specialist tells you, "You have certainly earned this, we will certainly be able to use you again in the future."
Notes
- ??


