imported>Tlosk |
imported>Immortalbob |
| (129 intermediate revisions by 18 users not shown) |
| Line 1: |
Line 1: |
| ===Description===
| | {{Gameplaynavlink}} {{righttoc}} |
| Introduced during [[Rekindling the Light]], the Colosseum is a place to allow adventurers to pit their skills against increasingly more difficult monsters in a short time frame.
| | {{Related|Fellowship}} |
|
| |
|
| Adventurer's have 1 hour to complete all rooms in the Colosseum. This is currently one of the most difficult tasks in Dereth, and only a well-tuned team of high-level adventurers can make it to the end.
| | Introduced during the [[Rekindling the Light]] event, the '''Colosseum''' is a place that hosts several arena style activies. It is located West of [[Yanshi]], at 11.3S 37.6E. The portal can be recalled, tied and summoned. |
|
| |
|
| ==[[Colosseum Bosses]]==
| | There is also a special vendor that sells items for Colosseum Coins [[Colosseum Coin Collector]] |
|
| |
|
| You can go fight several Colosseum bosses by using their statues in the hallway behind the main room. To access them you must first be flagged by reaching a certain arena in the regular Colosseum. Then simply use their statue to enter their personal chamber. When you kill the boss and any remaining creatures, a door will appear leading back to the Colosseum drop point.
| | == NPCs == |
| | * [[Colosseum Coin Collector]] |
| | * [[Colosseum Ticket Vendor]] |
| | * [[Master Arbitrator]] |
|
| |
|
| ==[[NPC]]s found in the Colosseum== | | ==Colosseum Arenas== |
|
| |
|
| [[Colosseum Coin Collector]]
| | The Colosseum Arenas consist of 18 ''arenas'' (rooms), each of which contains a variety of monsters. The goal is to defeat the creatures in all 18 rooms and use the final exit before the '''1 hour timer''' is up. The concept is simple; when you clear a ''room'', the door to the next room appears on the North wall. Being successful in the Colosseum is all about '''teamwork'''; everyone has different roles, and must play their role well to succeed. |
|
| |
|
| == What to know before you go ==
| | To begin your Colosseum run, you must have a [[Colosseum Ticket]], which can be purchased from the [[Colosseum Ticket Vendor]] for 5 MMDs or any [[Rares|Rare]]. |
| Being successful in the Colosseum is all about teamwork. Different people will have different roles, and everyone must play their role well in order to succeed.
| |
|
| |
|
| There are various strategies that can be used, and it is important that everyone be on the same page as to which strategy is in use. The quest leader will usually call out the damage type, formation and general strategy for each monster spawn. Although, if a group has been working together awhile, this might not be done and each individual is expected to know his role with each monster spawn. | | There are two entrances to the Colosseum Arena, and while both access the same set of rooms, the [[Advanced Colosseum Arena]] will start you further along: |
| | * {{Icon Link|Colosseum Arena}} - No level requirement, '''begins in Arena 1'''. |
| | ** The Colosseum Arena is typically only used if members of your party are less than level 80. If this is not the case, it makes more sense to start in the Advanced Colosseum Arena under most circumstances. |
| | * {{Icon Link|Advanced Colosseum Arena}} - 80+, '''begins in Arena 6'''. |
| | ** The Advanced Colosseum Arena is restricted to characters 80+. This entrance starts at '''Arena 6''', which is much further along than the regular [[Colosseum Arena]]. |
|
| |
|
| There are a few different types of Colosseum runs:
| | ===Colosseum Run Goals=== |
|
| |
|
| * '''Flagging run:''' Anybody, any level. This run is usually led by one or two higher level adventurers with a bunch of low level toons tagging along. The goal is gain access to the bottom 3 Boss dungeons. Little to no xp or other reward on this kind of run. | | * '''Flagging Run:''' For anyone. To gain access to the bottom 3 or 4 [[Colosseum Bosses]] (typically involves entering, but not starting, the 8th room of the Arena to flag for the first 4 bosses). |
| | * '''Fun Run:''' For anyone. Just to get familiar with the colosseum and its mechanics. Expectations should not be high, as teams rarely get far. |
| | * '''Coin Run:''' Generally 160+. Must beat '''Arena 13''' or higher. Experienced leader is a plus. |
| | * '''Rare Run:''' 200+ experienced and fully equipped players only. Goal is to complete all 18 arenas. Rares are required except for the most skilled of fellowships. |
|
| |
|
| * '''Fun run:''' anybody, generally level 80+ welcome. People are expected to follow the leaders instructions, but nobody will yell at you if not. These runs generally are done for XP only as they rarely get very far.
| | ===Beating the Colosseum=== |
|
| |
|
| * '''Training run/Coin run:''' Generally 160+, though lower level characters that are very good at playing are often invited. You are expected to know your role, the basic strategies through room 15 and follow leaders instructions. The normal minimum goal for this type of run is to reach Room 16 to get two coins and 300+ million xp. These runs generally do not use any rares, and adventurers are often not yet fully-equipped. In training runs, sticking around for after action reports is recommended along with Q&A.
| | Beating the Colosseum is rewarded with a [[Colosseum Vault Key]] which is used to open the [[Colosseum Vault]] containing Tier 7 loot and one of five [[Empyrean Rings]]. |
|
| |
|
| * '''Full run:''' High level characters that are experienced in Colosseum runs, that play well, know their roles and act as a full team attempt to complete the final room of the Colosseum. These runs generally use Rares and any other aids to speed up the kills. Adventurers are expected to be full equipped.
| | There are walkthroughs and guides on how to beat the Colosseum in the [[Advanced Colosseum Arena]] section. |
|
| |
|
| ==== Walkthrough ==== | | ==Colosseum Bosses== |
| Posted on Frostfell vnboards by Absolution Date Posted: 1/28 11:31am Subject: Colosseum Walkthrough
| | ''Quest guide: [[Colosseum Bosses]]'' |
|
| |
|
| http://vnboards.ign.com/frostfell/b5153/106124471/p1/?6
| | The colosseum contains several ''bosses'', which are in effect a 1-room arena that contains a spawn of monsters and one of the [[:Category:Boss Creatures|Boss Creatures]]. Each boss is accessed by using their respective statues that are located along the hallways of the lobby. In order to access these boss arenas, you must be flagged. Flagging consists of completing a certain ''arena'' in the [[Colosseum Arena]] or [[Advanced Colosseum Arena]]. As the difficulty of the boss increases, higher ''arenas'' must be completed to allow access: |
|
| |
|
| | '''Note:''' The Advanced Colosseum Arena begins at '''Arena 6'''. |
|
| |
|
| COLOSSEUM
| | * {{Icon Link|Stone Fists}} - Complete '''Arena 3''' in the [[Colosseum Arena]]. |
| | * {{Icon Link|Azaxis}} - Complete '''Arena 5''' in the [[Colosseum Arena]]. |
| | * {{Icon Link|Killagurg}} - Complete '''Arena 7''' in the [[Advanced Colosseum Arena]]. |
| | * {{Icon Link|Demon Swarm Matron}} - Complete '''Arena 8''' in the [[Advanced Colosseum Arena]]. |
| | * {{Icon Link|The Master}} - Win (complete all 18 rooms) in the [[Advanced Colosseum Arena]]. |
| | * {{Icon Link|Gladiator Diemos}} - 10 [[Advanced Colosseum Arena]] wins, [[Diemos Flagging]]. |
|
| |
|
| | ===Easter Egg Bosses=== |
|
| |
|
| GENERAL INFO
| | In addition to regular [[Colosseum Bosses]], there are also Easter Egg Bosses, which are located behind the [[Locked Door]] at the end of the Southeast hall. To access the statues behind the Locked Door, hand an [[Egg]] to the [[Master Arbitrator]]: |
|
| |
|
| | * {{Icon|Pumpkin King}} [[Pumpkin King]] - Hand a [[Blue Blanket]] to the [[Master Arbitrator]] for '''24 hour access'''. [[Blue Blanket]]s can only be found during Haloween on the corpse of [[Pumpkin Follower]]s. |
| | * {{Icon|Thunderchicken}} [[Thunder Chicken]] - Hand an [[Egg]] to the [[Master Arbitrator]]. |
| | * {{Icon|Very Mad Cow}} [[Very Mad Cow]] - Hand a [[Tipped Pack Cow]] to the [[Master Arbitrator]] (he does not keep it) |
|
| |
|
| The most important thing any group will need for a successful colosseum run is a group of 9 players who can work well together and follow directions. There are no set rules to beating the colosseum. This walkthrough is intended as a guide only. How your group succeeds is largely up to you. | | ==Images== |
| | Click image for full size. |
| | <gallery widths=200px heights=200px perrow=3> |
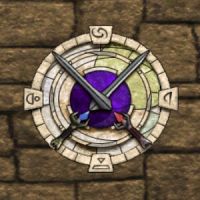
| | File:Colosseum Live.jpg|The mark of the Colosseum |
| | File:Gladiator Diemos Live.jpg|Gladiator Diemos |
| | File:Very Mad Cow Live.jpg|Very Mad Cow (Easter Egg boss) |
| | </gallery> |
|
| |
|
| | ==Update History== |
| | [[From Darkness, Light]] |
| | * XP gained from [[Colosseum Bosses]] is now received upon handing in the token each boss drops instead of the item you receive upon handing in the token. |
|
| |
|
| This is by no means the only way to beat the colosseum. This is one way of many. Every group or clan has their own preferred method.
| | ==Notes== |
| | | Landblocks |
| | | * 00AF - Colosseum staging area/Secret Mini-Bosses |
| TEMPLATES
| | * 00B0 - Colosseum Arena One |
| | | * 00B1 - Colosseum Arena Two |
| | | * 00B2 - Colosseum Arena Three |
| Specific templates are needed for many aspects of the colosseum with mages being the most prevalent. All characters should be maxed out in there offensive and defensive skills and attributes. You have to be able to deal damage on some of AC’s toughest mobs while taking minimal damage.
| | * 00B3 - Colosseum Arena Four |
| | | * 00B4 - Colosseum Arena Five |
| | | * 00B6 - Mini-Bosses |
| All templates can be useful in colosseum. There is literally something for everyone. The important part is assigning players to specific tasks that maximize their skills. Mages who can go racial are a definite bonus to the group and will make success easier.
| | [[Category:Dungeons]] |
| | | [[Category:Gameplay]] |
| | | [[Category:Colosseum]] |
| | |
| AUGMENTATIONS
| |
| | |
| | |
| Augmentations are important. At a minimum all players should have 1:15 minute buffs and the no spell drop on death aug. Of course multiple augmentations will only make it easier.
| |
| | |
| | |
| | |
| WEAPONS
| |
| | |
| | |
| Weapons play a large role as well. All players should have max or near max tinked weapons in every variety.
| |
| | |
| | |
| Mages should have ALL the damage types in render wands as well as a good CS wand. They should also have Virindi slayer, Mukkir slayer on a Bludgeon Rend, Shadowfire, Undead slayer on Fire Rend, Olthoi Slayer wands, and Healers Heart. A nice highly tinked green garneted bludgeon rend wand is also nice to have for the TM’s. Mages who can go racial or have an alternate melee or archer attack should also bring some of these renders, AR (armor rend), and/or CS (critical strike).
| |
| | |
| | |
| Melees and Archers should have ALL damage types in render weapons as well as some specific weapons in AR (armor render) or CS.(critical strike) AR frost is critical. For some instances is will be helpful for melees to have a Ultimate Singularity Life wand. This is for occasions where they are assigned to cast life rings (Raven Fury). Healers Hearts are recommended in case you are assigned to heal.
| |
| | |
| | |
| | |
| SPELLS
| |
| | |
| | |
| Spells are the most important factor for colosseum. Mages, Melees, and Archers should have all beneficial buffing spells, banes, and restorative spells. There are also several war spells and life spells that are mandatory.
| |
| | |
| | |
| Mages should have the following additional spells: Tusker Fists, Raven Fury, All ring spells, Most, if not all wall spells.
| |
| | |
| | |
| Melees and Archers should have Raven Fury spell. When using Raven Fury, the Melee will be responsible for regaining their own health, unless someone is assigned as a healer beforehand.
| |
| | |
| | |
| | |
| RESTORATIVES
| |
| | |
| | |
| Restoratives like Coral Hearts, Burning Coals, Beers, etc. etc. Can shave a lot of time overall. Bring all you have and don’t be shy with them. The time they save you, may be all you need to finish. Do not underestimate their value here.
| |
| | |
| | |
| | |
| RARES
| |
| | |
| | |
| Rares make the colosseum go round.
| |
| | |
| | |
| Mages should bring at a minimum 1 War rare, 1 Magic Resist rare, and 1 Melee Defense rare or their equivalents.
| |
| | |
| | |
| Melees and Archers should bring at a minimum 1 Magic Defense rare, 1 Melee Defense rare, 1 Skill rare, and 1 Blood Drinker rare. Life rares are helpful too and will be needed for melees or archer who are assigned to vuln at specific points.
| |
| | |
| | |
| Extra rares such as Mana Con for Mages or additional BD rares for Melees and Archers certainly will not hurt.
| |
| | |
| | |
| | |
| GROUPING
| |
| | |
| | |
| There are endless combinations of group make-ups for colosseum. This walkthrough will deal with 5 types and should work well with any of these combinations. There are ways to do it with fewer mages, but I don’t know them so this is what you get.
| |
| | |
| | |
| 6 Mages, 2 Melee, and 1 Archer
| |
| | |
| | |
| 6 Mages, 1 Melee, and 2 Archer
| |
| | |
| 7 Mages, 1 Melee, and 1 Archer
| |
| | |
| | |
| 7 Mages and 2 Melee
| |
| | |
| | |
| 7 Mages and 2 Archer
| |
| | |
| | |
| | |
| FORMATIONS
| |
| | |
| | |
| Where you stand in colosseum is as important as anything else. Here is a list and explanation of the 5 formations used for this walkthrough and their in-game abbreviations:
| |
| | |
| | |
| | |
| BELL – In the bell formation all the mages space themselves evenly around the bell at a distance to where their war rings will just overlap. Melees and Archers will stay in the center of the bell during this formation. This formation allows Mages to ring non-stop and create maximum damage to any enemies that run towards them. Melees and Archer can play support in the middle while not drawing any creatures.
| |
| | |
| | |
| ROOM – In the room formation the entire group disperses evenly all around the room. Using the colored platform edges is a good guide. This formation allows Mages to fire streaks, arcs, or bolts anywhere in the room, and allows Melees and Archers to also attack anywhere it’s needed. In this formation there are a few rooms where mages can use Tusker Fists to do mega damage. The Mages can maneuver around the room and line targets up for maximum damage. This works very well in the C lord/Shard room and Ruschk room.
| |
| | |
| | |
| WW – Wall to Wall. Prior to the start of the colosseum run players will be assigned a wall. It will be East or West. In the WW formation each player will run to their assigned wall and line up a few paces from the south wall facing the opposite group. This allows the Mages to cast Tusker Fists from wall to wall and crush any enemies in between. This is one of the most used formations and does the most damage. Melees and Archers go to their assigned sides and play support or attack so long as they are not interfering with the Mage’s wall spells.
| |
| | |
| | |
| SW – In this formation all the players group loosely in the south west corner. This allows a spread or blanket fire into the room and brings the enemies to one part of the arena for easy disposal.
| |
| | |
| | |
| TRI – Triangle. This formation is used on the Tremendous Monouga’s only. The players go to their assigned walls. 2 Mages are assigned beforehand to go into the center of the room north of the bell. This will give the group at least 2 mages at each corner of the triangle. The mages to the east and west should remember to step away from the wall a little bit to allow more freedom of movement. The concept behind the triangle is to create the ability to shoot Tusker Fists to your left or your right. The triangle will give you a clear target in almost every cast. You can move side to side slightly to create a clearer shot.
| |
| | |
| | |
| | |
| ARENAS
| |
| | |
| | |
| | |
| ARENA 6 – Mosswart / Lugian & Mattekar
| |
| | |
| | |
| Mosswart -We start the arena in ROOM formation. Mages cast ONE streak spell at one Mosswart and then select another and cast streak again. Continue until room is clear. Melees and Archer attack at will.
| |
| | |
| | |
| Lugians & Mattekars - We move to BELL formation and Mages cast pierce rings with a pierce rending wand. Switch to arcs when only a few remain. Archers use pierce rend and attack at will and Melees cast Life rings or use pierce rend and attack any stragglers without disrupting the Mage’s ringing.
| |
| | |
| | |
| ARENA 7 – Eaters / Viamontians
| |
| | |
| | |
| Eaters – We start in BELL formation and Mages cast slash rings using a slash rending wand. Switch to Arcs when only a few remain. Archers use slash rend and attack at will. Melees use life rings or use slash rend and attack without disrupting the mage’s rings.
| |
| | |
| | |
| Viamontians – We move to ROOM formation and Mages cast Arcs using a lightning rending wand. Cast one Arc then select a new target and cast again. Continue until room is clear. Archers and Melee use Lightning rend and attack at will.
| |
| | |
| | |
| ARENA 8 – Dillos & Zefirs / C Lord & Minions & Shards
| |
| | |
| | |
| Dillos & Zefirs – We start out in SW formation. Mages imperil all the Dillos and Zefirs. Once all are imperiled switch to Arcs using slash rend or bludgeon rend. Archers and Melee target the imped Dillos and Zefirs using slash rend or pierce rend on dillos. If there are 1 or 2 mages who can go racial or have an alternate attack, they can attack with the Archer and Melees for this spawn.
| |
| | |
| | |
| C Lord & Minions & Shards - We move to ROOM formation here. Mages cast Tusker Fists with bludgeon rend non-stop. Make sure you line up multiple targets for mass damage. Archers use bludgeon rend to take out the satellite shards and minions. ALL Melee attack the C Lord when it spawns with bludgeon, pierce, or slash rend. We need at least 3 Melees on the C Lord so if necessary 1 or 2 Mages can go racial with the Melees.
| |
| | |
| | |
| ARENA 9 – Olthoi / Shadows
| |
| | |
| | |
| Olthoi – We start in WW formation. In the first spawn a group of grubs will spawn. Mages can shoot a few of these then switch to wall to wall casting Tusker Fists at the group across from you using bludgeon rend wands. Archers attack at will using bludgeon rend. Melees can attack using bludgeon rend or pierce rend but only when the Olthoi come to you. Avoid getting in the way of the Mage’s wall spells.
| |
| | |
| Shadows – Here we change to ROOM formation and Mages cast a fire wall spell or Tusker Fists right before the spawn using Shadowfire wands. Then the mages will cast Arcs at individual Shadows using Shadowfire wand. Target one enemy and shoot one Arc, then switch to a new target and do the same. Continue until room is clear. Archers and Melees attack at will with Shadowfire or fire rend weapons.
| |
| | |
| | |
| ARENA 10 – Sleeches / Ninjas
| |
| | |
| | |
| Sleeches – We start in SW formation. Mages cast Tusker Fists into the room in all directions using bludgeon rend wands. After the initial spawn, Mages will switch to Arc spells until the room is clear. Archers and Melee attack with bludgeon rend or pierce rend at will without disrupting the mage wall spells early on.
| |
| | |
| | |
| Ninjas – We move to ROOM formation. Mages can cast a wall or ring right before the initial spawn then switch to Arcs using lightning rend or acid rend. Shoot multiple Arcs at each enemy until target is dead, then move on to the next. Archers and Melee attack at will using lightning rend or acid rend. Melees can also cast Life rings here if there is a large group of enemies around them.
| |
| | |
| | |
| | |
| ARENA 11 – Tuskers & Virindi / Spirits
| |
| | |
| | |
| Tusker & Virindi – We start in BELL formation. Mages cast rings using fire rend wands non stop, then switch to Arcs when a few remain. If only virindi remain, quickly switch to your Sing wands (remember to switch back before the next spawn). Melees cast fire vuln on all the virindi and then cast imperil on all the virindi and switch to fire rend or Sing weapon once all are vulned/imped . Archers can target and attack the vulned/imped virindi as they are debuffed with fire rend or sing bow.
| |
| | |
| | |
| Spirits – We move to ROOM formation. Mages cast a wall spell or rings just prior to the spawn and then switch to Arcs using fire rend. Target one and cast one Arc, then select a new target and repeat. Melees and Archers attack at will using fire rend.
| |
| | |
| | |
| | |
| ARENA 12 – Ruschk / Mukkir
| |
| | |
| | |
| Ruschk - We start in ROOM formation. Mages cast Tusker Fists with bludgeon rend non-stop. Make sure you line up multiple targets for mass damage. Switch to Arcs when only a few remain. Archer and Melees attack at will using bludgeon rend, pierce rend, or slash rend.
| |
| | |
| | |
| Mukkir – We move to WW formation. Mages cast Tusker Fists non-stop at the opposite group using bludgeon rend with Mukkir slayer. Melees stay on your assigned wall and cast support spells like heal, stamina, or mana as needed. Archer kill at will using bludgeon, slash, or pierce rend with Mukkir slayer.
| |
| | |
| | |
| | |
| ARENA 13 - Ravager & Virindi / Lugian / Ursuin
| |
| | |
| | |
| Ravager & Virindi – Here we start in SW formation. Equipping Sing wands Mages cast imperil and frost rend on all Ravagers and then fire vuln the Virindi. Once ALL are vulned mages switch to Arcs and kill the Virindi. Melee attack the Ravagers with frost AR weapons. Once dead, switch to fire rend or sing weapon and help finish the Virindi. Archers shoot the Ravagers with AR bow and frost arrows (spectral preferred). Melee and Archers help with Virindi as needed after the Ravagers are dead. Mages help with the Ravagers using arcs if needed.
| |
| | |
| Lugian – We move to ROOM formation. Mages imp all the Lugians making sure not to miss any in the room. Melees and Archers kill at will using light rend. If a Mage or two can go racial here it will make the room much easier. A group of 5 impers and 4 killers is a good mix.
| |
| | |
| | |
| Ursuin – We stay in ROOM formation . Mages imp all the Ursuin making sure not to miss any in the room. Melees and Archers kill at will using fire rend. Again if a Mage or two can go racial it will make this room easier and faster.
| |
| | |
| | |
| | |
| ARENA 14 – Virindi / Olthoi
| |
| | |
| | |
| Virindi – EVERYONE USE MAGIC DEFENSE RARE - We start this room in SW formation. Mages equip Sing wands and target Quidox Virindi first. Mages fire vuln their selected target with fire rend and then shoot Arcs until it is dead, then switch to the next target and repeat. Melees move out from the wall a bit in an even formation and cast life rings (Raven Fury) over and over with the Life Sing wand. Keep yourself healed between rings (if you have a spare Life rare you can use it in the previous room in preparation for this). Archers will also move in with the Melee and cast life rings with the same instructions as the Melee. Use of a life rare in the previous room is not absolutely necessary, but will help quite a bit.
| |
| | |
| | |
| Olthoi – We move to WW formation. Mages cast Tusker Fists non-stop at the opposite group using bludgeon rend. Melees stay on your assigned wall and cast support spells like heal, stamina, or mana as needed. Archers kill at will using bludgeon rend.
| |
| | |
| | |
| | |
| ARENA 15 – Mosswart / Undead
| |
| | |
| | |
| Mosswart – We start in SW formation. Mages cast imperil on all targets. Once all are imped, then switch to Arcs using fire rend. Mages must focus on Gladiators. Melees kill at will with fire rend. Archers kill at will with fire rend.
| |
| | |
| | |
| Undead – MAGES USE WAR RARE. MELEE/ARCHER USE SKILL RARE – We move to BELL formation. Mages cast fire rings with fire rend wands with Undead slayer. Switch to Arcs when a few remain. Tusker Fists can also be used by a few mages here, but only if they have Undead slayer on a bludgeon rend wand. Also make sure if you use this technique you are not drawing too many away from the main attack. Melees can attack at will any that make it inside the ring with Undead fire rend or play support as needed. Archers kill at will with Undead fire rend.
| |
| | |
| | |
| | |
| ARENA 16 – Hands / Swarm Demons
| |
| | |
| | |
| Hands – We start in BELL formation. Mages cast lightning rings with lightning rend, then switch to Arcs when a few remain. Melee and Archers attack at will with lightning rend.
| |
| | |
| | |
| Swarm Demons – EVERYONE USE MELEE DEFENSE RARE - Start this spawn in BELL formation. The EAST side group will cast bludgeon vuln on all Demons. The WEST side group will cast decreptitude’s grasp on all Demons at the same time. Once ALL are vulned the group will split up and go to the WW formation. Mages will cast Tusker Fists non-stop with Olthoi slaying wands. Mages will switch to Arcs when a few remain. Melees will play support and heal, stamina, or mana as needed. Archers can attack at will using bludgeon rend.
| |
| | |
| | |
| | |
| ARENA 17 – Tuskers & Virindi / Penguins
| |
| | |
| | |
| Tuskers & Virindi – We start in BELL formation. Mages cast rings using fire rend wands non stop, then switch to Arcs when a few remain. If only Virindi remain, quickly switch to your Sing wands (remember to switch back before the next spawn). Melees cast fire vuln on all the Virindi and then cast imperil on all the Virindi and switch to fire rend or Sing weapon once all are vulned/imped . Archers can target and attack the vulned/imped Virindi as they are debuffed with fire rend or sing bow.
| |
| | |
| | |
| Penguins – We stay in BELL formation. Mages cast fire rings with fire rend wands, switch to Arcs when few remain. Melees and Archers attack at will with fire rend while not disrupting the Mage’s rings.
| |
| | |
| | |
| | |
| ARENA 18 – Tremendous Monouga / Guardians
| |
| | |
| | |
| TM’s – We start in the TRI formation. Mages using CS wands or specially tinked TM wands cast Tusker Fists at any open TM. Keep turning side to side to get clear shots. Melees and Archers cast bludgeon vuln, decreptitude’s grasp, imperil, and frost vuln on all TM’s in that specific spell order. Once all TM’s are fully vulned then the Melees and Archers may attack at will using frost AR weapons (spectral arrows for Archers preferred). Be sure not to impede the Mage’s wall spells,
| |
| | |
| | |
| Guardians – We move to SW formation. 2 Mages will be assigned to frost vuln, imperil, and fester all the guardians. Mages will use frost Arcs with CS wands. Melee will use AR frost weapons. Archers will use AR frost bows (spectral arrows preferred). Kill the guardians one at a time from the left to the right.
| |
| | |
| | |
| | |
| YOU WIN!!!!
| |
| | |
| | |
| | |
| IN GAME CHEAT SHEET
| |
| | |
| | |
| | |
| Arena 6 spawn 1 = ROOM – Fire Rend All
| |
| | |
| | |
| Arena 6 spawn 2 = BELL – Pierce Rend Mages – Light Rend Melee/Archer
| |
| | |
| | |
| | |
| | |
| Arena 7 spawn 1 = BELL – Slash Rend all
| |
| | |
| | |
| Arena 7 spawn 2 = ROOM – Lightning Rend All
| |
| | |
| | |
| | |
| | |
| Arena 8 spawn 1 = SW – Slash/Bludgeon Rend Mages – Bludgeon,Pierce,Slash Rend Melee/Archer
| |
| | |
| | |
| Arena 8 spawn 2 = ROOM – Bludgeon Rend All - Pierce is alternate
| |
| | |
| | |
| | |
| | |
| | |
| Arena 9 spawn 1 = WW – Bludgeon Rend All – Pierce is alternate
| |
| | |
| | |
| Arena 9 spawn 2 = ROOM – Shadowslayer All – Fire Rend is alternate
| |
| | |
| | |
| | |
| | |
| | |
| Arena 10 spawn 1 = SW – Bludgeon Rend All – Pierce, Slash Rend is alternate
| |
| | |
| | |
| Arena 10 spawn 2 = ROOM – Lightning or Acid Rend All
| |
| | |
| | |
| | |
| | |
| | |
| Arena 11 spawn 1 = BELL – Fire Rend All – Sing as needed
| |
| | |
| | |
| Arena 11 spawn 2 = ROOM – Fire Rend All
| |
| | |
| | |
| | |
| | |
| | |
| Arena 12 spawn 1 = ROOM – Bludgeon Rend All – Pierce, Fire is alternate
| |
| | |
| | |
| Arena 12 spawn 2 = WW – Mukkir Slayer Bludgeon Rend All – Slash is alternate
| |
| | |
| | |
| | |
| | |
| Arena 13 spawn 1 = SW – Sing wand Mages – Frost AR Melee/Archer
| |
| | |
| | |
| Arena 13 spawn 2 = ROOM – Light Rend All
| |
| | |
| | |
| Arena 13 spawn 3 = ROOM – Fire Rend All
| |
| | |
| | |
| | |
| | |
| | |
| Arena 14 spawn 1 = SW – MAG DEF RARE – Sing wand All
| |
| | |
| | |
| Arena 14 spawn 2 = WW = Bludgeon Rend All – Pierce is alternate
| |
| | |
| | |
| | |
| | |
| Arena 15 spawn 1 = SW – Fire Rend All
| |
| | |
| | |
| Arena 15 spawn 2 = BELL – WAR/SKILL RARE – Undead Fire Rend All
| |
| | |
| | |
| | |
| | |
| Arena 16 spawn 1 = BELL – Lightning Rend All
| |
| | |
| | |
| Arena 16 spawn 2 = BELL – WW – MELEE DEF RARE – Olthoi Slayer Mages – Bludgeon Rend Archers
| |
| | |
| | |
| | |
| | |
| Arena 17 spawn 1 = BELL – Fire Rend All – Sing as needed
| |
| | |
| | |
| Arena 17 spawn 2 = BELL – Fire Rend All
| |
| | |
| | |
| | |
| | |
| Arena 18 spawn 1 = TRI – CS Mages – Frost AR or CS Melee/Archer
| |
| | |
| | |
| Arena 18 spawn 2 = SW – CS Mages – Frost AR or CS Melee/Archer
| |
| | |
| | |
| | |
| | |
| | |
| Hope this helps some of you. Practice makes perfect and the better you get as a group the fewer rares you will need.
| |
| | |
| | |
| ===Rewards===
| |
| ====Room Rewards====
| |
| There is an percent based experience reward associated with completing every arena. If you are over level 166 the xp is a flat amount, if you are under 166 the amount is a percentage of your next level. For completing certain stages (arena 13 and up) you are rewarded with [[Colosseum Coin]]s. You must use the exit door to have completed a room. For example, killing the spawn in room 10 then using the door and entereing room 11 counts as having beaten 10.
| |
| | |
| {|border=1 cellspacing=2 cellpadding=5 align=center
| |
| !Room
| |
| !Title
| |
| !XP 166+
| |
| !XP 1-165
| |
| !Coins
| |
| |-
| |
| |align=center| '''1'''
| |
| |align=center| Scrapper
| |
| |align=center| 10,000
| |
| |align=center| 10,000
| |
| |align=center| -
| |
| |-
| |
| | |
| |align=center| '''2'''
| |
| |align=center| Arena Rat
| |
| |align=center| 50,000
| |
| |align=center| 50,000
| |
| |align=center| -
| |
| |-
| |
| | |
| |align=center| '''3'''
| |
| |align=center| Arena Custodian
| |
| |align=center| 100,000
| |
| |align=center| 100,000
| |
| |align=center| -
| |
| |-
| |
| | |
| |align=center| '''4'''
| |
| |align=center| Drudge Dread
| |
| |align=center| 150,000
| |
| |align=center| 150,000
| |
| |align=center| -
| |
| |-
| |
| | |
| |align=center| '''5'''
| |
| |align=center| Contender
| |
| |align=center| 200,000
| |
| |align=center| 200,000
| |
| |align=center| -
| |
| |-
| |
| | |
| |align=center| '''6'''
| |
| |align=center| Gladiator
| |
| |align=center| 500,000
| |
| |align=center| 500,000
| |
| |align=center| -
| |
| |-
| |
| | |
| |align=center| '''7'''
| |
| |align=center| Warrior of the Seventh Circle
| |
| |align=center| 18,779,866
| |
| |align=center| 4%
| |
| |align=center| -
| |
| |-
| |
| | |
| |align=center| '''8'''
| |
| |align=center| Survivalist
| |
| |align=center| 28,169,799
| |
| |align=center| 6%
| |
| |align=center| -
| |
| |-
| |
| | |
| |align=center| '''9'''
| |
| |align=center| Hostile Combatant
| |
| |align=center| 37,559,732
| |
| |align=center| 8%
| |
| |align=center| -
| |
| |-
| |
| | |
| |align=center| '''10'''
| |
| |align=center| Myrmidon
| |
| |align=center| 46,949,665
| |
| |align=center| 10%
| |
| |align=center| -
| |
| |-
| |
| | |
| |align=center| '''11'''
| |
| |align=center| Pit Fighter
| |
| |align=center| 93,899,330
| |
| |align=center| 20%
| |
| |align=center| -
| |
| |-
| |
| | |
| |align=center| '''12'''
| |
| |align=center| Ring Master
| |
| |align=center| 140,848,995
| |
| |align=center| 30%
| |
| |align=center| -
| |
| |-
| |
| | |
| |align=center| '''13'''
| |
| |align=center| Lord of the Arena
| |
| |align=center| 187,798,660
| |
| |align=center| 40%
| |
| |align=center| 1
| |
| |-
| |
| | |
| |align=center| '''14'''
| |
| |align=center| Fearless
| |
| |align=center| 234,748,325
| |
| |align=center| 50%
| |
| |align=center| 1
| |
| |-
| |
| | |
| |align=center| '''15'''
| |
| |align=center| Master Gladiator
| |
| |align=center| 281,697,990
| |
| |align=center| 60%
| |
| |align=center| 2
| |
| |-
| |
| | |
| |align=center| '''16'''
| |
| |align=center| Colossus
| |
| |align=center| 305,172,823
| |
| |align=center| 65%
| |
| |align=center| 3
| |
| |-
| |
| | |
| |align=center| '''17'''
| |
| |align=center| Titan
| |
| |align=center| 328,647,655
| |
| |align=center| 70%
| |
| |align=center| 4
| |
| |-
| |
| | |
| |align=center| '''18'''
| |
| |align=center| Colosseum Champion
| |
| |align=center| 328,647,655
| |
| |align=center| 70%
| |
| |align=center| 4
| |
| |-
| |
| |}
| |
| | |
| ====Rings====
| |
| For beating all 18 arena in under an hour you will receive a [[Colosseum Vault Key]] to the Colosseum chest which has [[Black Marrow Reliquary]] grade loot and one of five special rings (random). Duplicate or unwanted rings can be given to the Master Arbitrator for 140 million xp and 2 Colosseum Coins. Ivory can be applied to a ring so the ring can be turned in by someone else (xp and coins are the same).
| |
| | |
| {|border=1 cellpadding=3 align=center
| |
| !Ring
| |
| !Spells
| |
| |-
| |
| |align=center|[[Red Ring]]<br>[[Image:redicon.jpg]]
| |
| |Regeneration Incantation (+145%)<br>Essence Glutton (Health +30)
| |
| |-
| |
| |align=center|[[Blue Ring]]<br>[[Image:blueicon.jpg]]
| |
| |Mana Renewal Incantation (+145%)<br>Empyrean Mana Absorption (+100 Mana)<br>Mana Conversion Mastery Incantation (+45 MC)<br>Major Piercing Ward
| |
| |-
| |
| |align=center|[[White Ring]]<br>[[Image:whiteicon.jpg]]
| |
| |Major Bludgeoning Ward<br>Major Piercing Ward<br>Major Slashing Ward
| |
| |-
| |
| |align=center|[[Yellow Ring]]<br>[[Image:yellowicon.jpg]]
| |
| | Rejuvenation Incantation (Stamina Rejuvenation +145%)<br>Empyrean Stamina Absorption (+100 Stamina)<br>Aurlanaa's Resolve (Stamina Rejuvenation +120% Cantrip)<br>Empyrean Enlightenment (Arcane Lore +60)<br>Major Slashing Ward
| |
| |-
| |
| |align=center|[[Green Ring]]<br>[[Image:greenicon.jpg]]
| |
| |Empyrean Regeneration (+50%)<br>Empyrean Rejuvenation (+50%)<br>Empyrean Mana Renewal(+50%)<br>Epic Bludgeon Ward (+20%)
| |
| |-
| |
| |}
| |
| | |
| | |
| [[Category:Location]] | |
| [[Category:Quest]] | |
| [[Category:HighXP]] | |
 Colosseum Arena - No level requirement, begins in Arena 1.
 Advanced Colosseum Arena - 80+, begins in Arena 6.
 Stone Fists - Complete Arena 3 in the Colosseum Arena.
 Azaxis - Complete Arena 5 in the Colosseum Arena.
 Killagurg - Complete Arena 7 in the Advanced Colosseum Arena.
 Demon Swarm Matron - Complete Arena 8 in the Advanced Colosseum Arena.
 The Master - Win (complete all 18 rooms) in the Advanced Colosseum Arena.
 Gladiator Diemos - 10 Advanced Colosseum Arena wins, Diemos Flagging.